Table 1
| Required Tools |
| Tool |
Part Number |
Part Description |
Qty |
| A |
6V-2012 |
Depth Micrometer |
1 |
Note: Cleanliness is an important factor. Before assembly, thoroughly clean all parts in cleaning fluid. Allow the parts to air dry. Do not use wiping cloths or rags to dry parts. Lint may be deposited on the parts which may cause trouble. Inspect all parts. If any parts are worn or damaged, use new parts for replacement. Dirt and other contaminants can damage the precision component. Perform assembly procedures on a clean work surface. Keep components covered and protected at all times.
|
|
|
|
| Illustration 1 |
g00878554 |
|
|
|
|
| Illustration 2 |
g00878543 |
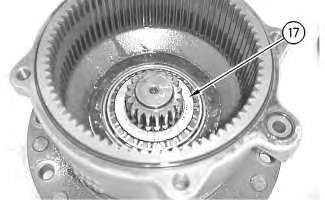
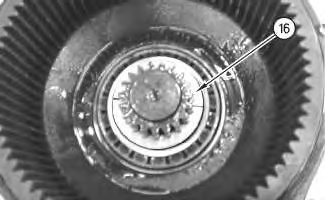
- Bearing (17) is nonserviceable outside the housing. Install ring (16) .
|
|
|
|
| Illustration 3 |
g00878383 |
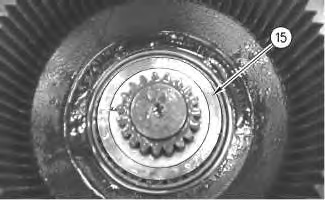
- Install collar (15) .
|
|
|
|
| Illustration 4 |
g00878372 |
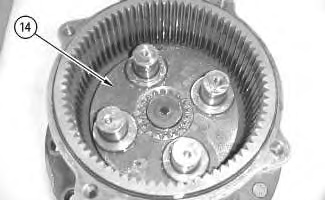
- Install holder (14) .
|
|
|
|
| Illustration 5 |
g00878365 |
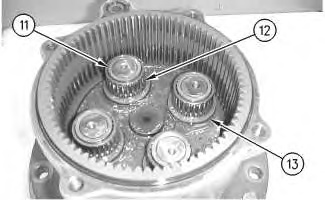
- Install spacers (13), races (11), and bearings (12) .
|
|
|
|
| Illustration 6 |
g00878339 |
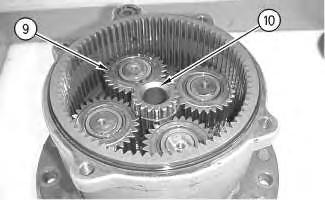
- Install four gears (9). Install gear (10) .
|
|
|
|
| Illustration 7 |
g00878254 |
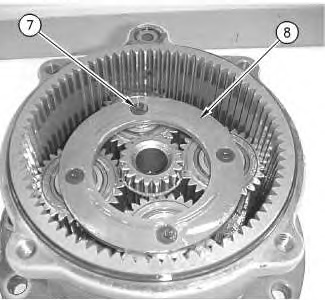
- Install plate (8) with screws (7). Tighten screws (7) to a torque of 25 ± 5 N·m (18 ± 4 lb ft).
|
|
|
|
| Illustration 8 |
g00878154 |
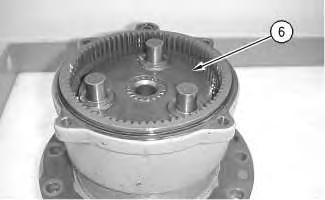
- Install holder (6) .
|
|
|
|
| Illustration 9 |
g00878147 |
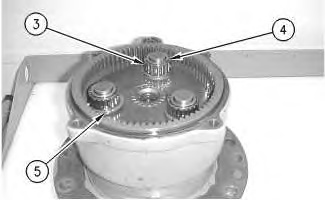
- Install spacers (5), inner races (4), and bearings (3) .
|
|
|
|
| Illustration 10 |
g00878038 |
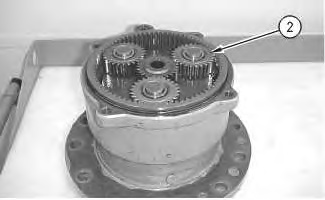
- Install gears (2) .


