Assembly Procedure
|
|
|
|
|
|
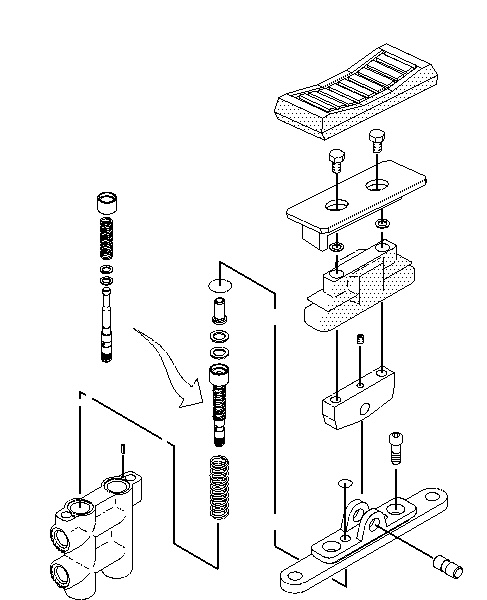
| Illustration 1 | g00620604 |
|
Exploded view of pilot valve |
|
- Be sure that all parts of the pilot valve are thoroughly clean and free of dirt and debris prior to assembly. Check the condition of all parts in the pilot valve. If any of the parts are worn or damaged, use new parts for replacement. Replace all O-ring seals with new O-ring seals. Apply clean hydraulic oil on all parts of the pilot valve during assembly.
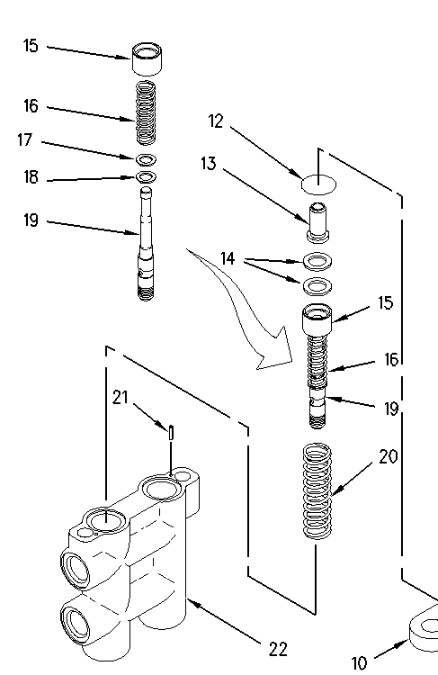
- Install shims (18), washer (17), spring (16), and seat (15) on spool (19) .
- Install spring (20) on spool (19) .
- Install the spool assembly in valve body (22) .
- Install shims (14) in seat (15) .
- Install pushrod (13) in seat (15) .
- Repeat Step 3 through Step 7 in order to assemble the other spool assembly.
- Install O-ring seals (12) in cover (10) .

- Install cover (10) on valve body (22) .
Note: Make sure that pushrods (13) do not damage the O-ring seals.
- Install bolts (8). Tighten the bolts to a torque of 11 N·m (8 lb ft).
- Position pedal (7) and install pin (11) .
- Install set screw (6). Tighten the set screw to a torque of 5 N·m (45 ± 10 lb in).
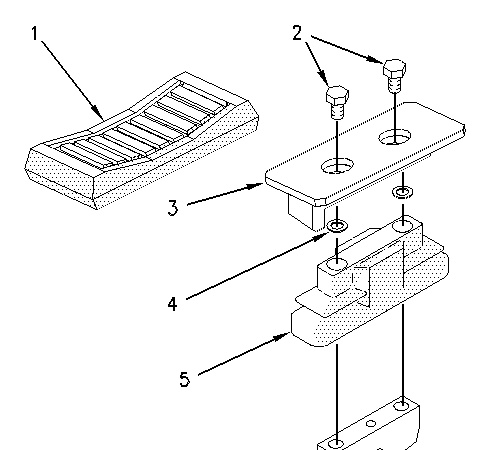
- Position pedal assembly (3) and install bolts (2). Tighten the bolts to a torque of 33 N·m (25 lb ft).
- Install rubber pedal (1) .
End By:
Install the pilot valve. Refer to Disassembly and Assembly, “Pilot Valve (Implement) – Install”.