Assembly Procedure
| Required Tools | |||
| Tool | Part Number | Part Description | Qty |
| A | 1P-1861 | Retaining Ring Pliers | 1 |
Note: Cleanliness is an important factor. Before assembly, all parts should be thoroughly cleaned in cleaning fluid. Allow the parts to air dry. Wiping cloths or rags should not be used to dry parts. Lint may be deposited on the parts which may cause trouble later. Inspect all parts. If any parts are worn or damaged, use new parts for replacement. All disassembly and all assembly procedures must be performed on a clean work surface and in a clean hydraulic area. Keep clean parts covered and protected at all times.
Note: Check the O-ring seals, the gaskets, and the seals for wear or for damage. Replace the components, if necessary.
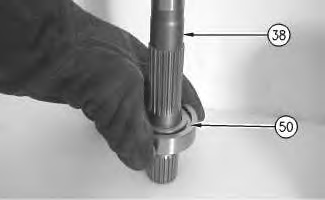
- Raise the temperature of bearing (50) and install shaft (38) in the bearing.
|
|
|
|
|
|
| Illustration 1 | g00876700 |
|
Typical Example |
|
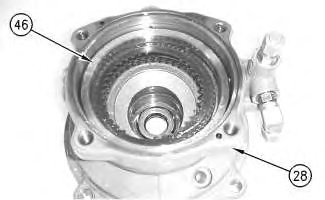
- Install plates (48) in housing (28) .
|
|
|
|
|
|
| Illustration 3 | g00875590 |
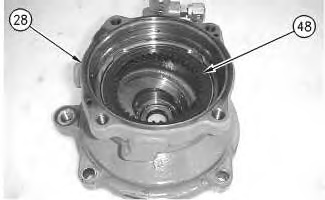
Note: Install plates (48) in the order that was noted during the disassembly procedure. Refer to Disassembly and Assembly, “Swing Motor – Disassemble”.
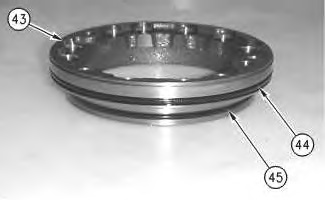
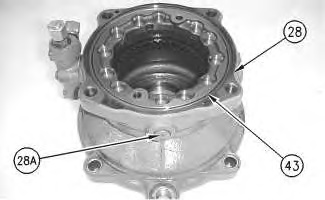
- Install piston (43) in housing (28). Install plug (28A). Tighten plug (28A) to a torque of 15.70 ± .78 N·m (138.96 ± 6.90 lb in).
|
|
|
|
|
|
| Illustration 7 | g00876310 |
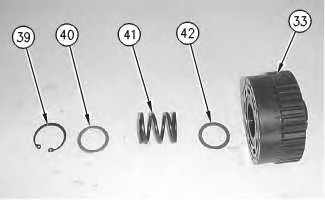
- Install washer (42), spring (41), and spacer (40) in barrel (33) .
|
Improper assembly of parts that are spring loaded can cause bodily injury. To prevent possible injury, follow the established assembly procedure and wear protective equipment. |
|
|
|
|
|
|
| Illustration 8 | g00875331 |
|
|
|
|
|
|
| Illustration 9 | g00875346 |
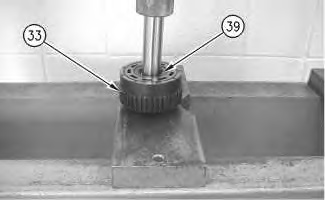
- Use a suitable press to compress spring (41) and use Tooling (A) to install retaining ring (39) in barrel (33) .
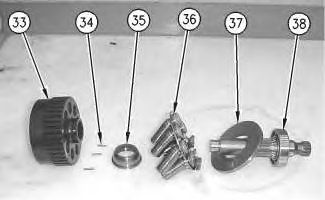
- Install pistons (36) in the same holes in barrel (33) that were noted during the disassembly procedure.
- Install plate (37) and shaft (38) in barrel (33) .