Be careful when you handle delicate electronic components. Improper handling can damage the components.
Do not drop the components. Do not force apart the components and do not force the components together. Do not allow water or dirt to enter the unit. Remove all dust, dirt, and moisture from the unit before disassembly.
|
|
|
|
|
|
| Illustration 1 | g00856746 |
|
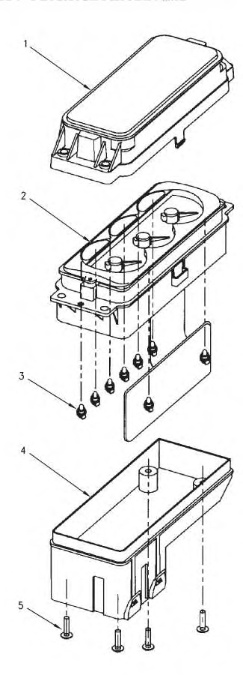
Exploded view of the monitor (1) Upper frame (2) Monitor board assembly (3) Indicator lamps (4) Lower frame (5) Tapping screws |
|
|
|
|
|
|
|
| Illustration 2 | g00856749 |
|
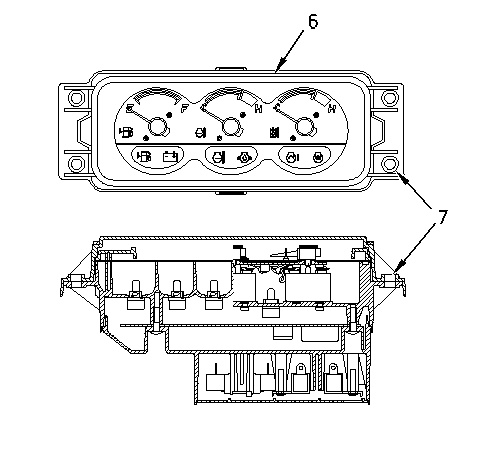
Monitor (6) Monitor panel (7) Tapping screws |
|
- Follow the steps below in order to remove monitor panel (6) from the console:
- Remove the harness connector.
- Remove four tapping screws (7) from the bottom of the monitor.
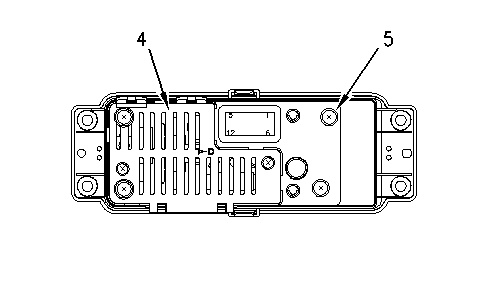
- Remove four tapping screws (5) that hold monitor board assembly (2) to lower frame (4) .
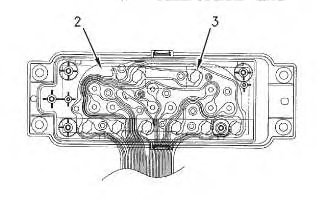
Note: Raise monitor board assembly (2) carefully.
|
|
|
|
|
|
| Illustration 3 | g00856751 |
|
(4) Lower frame (5) Tapping screws |
|


