Note: The 325C, M325C MH, and 330C series does not have a governor actuator.
This function can memorize the rotation angle of the governor actuator and the no-load engine speed. This information is saved into the controller after the accelerator cable of the governor actuator has been replaced, installed and/or adjusted. The controller will use the information that was saved in order to determine the target position for the actuation of the governor actuator.
Note: Ensure that the calibration procedure for the governor actuator is performed when the governor actuator, the accelerator cable or the controller has been replaced or installed. The temperature of the hydraulic oil should be 50 °C (122 °F) prior to the calibration.
|
|
|
|
| Illustration 1 |
g00777652 |
|
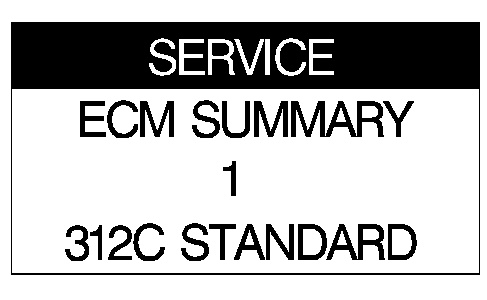
The above illustration is an example of the display for the 312C. All of the other displays are identical with the sales model on the fourth line.
|
- Enter the service mode.
|
|
|
|
| Illustration 2 |
g00825978 |
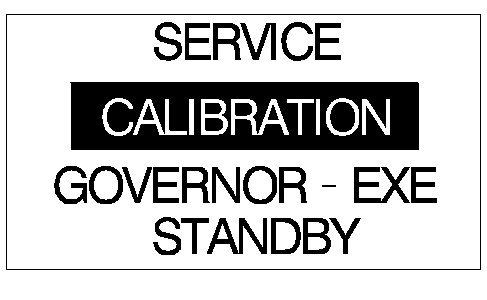
- Highlight the second line of the display and use the direction for direction to scroll through the display. Scroll through the display until the display shows “CALIBRATION”.
|
|
|
|
| Illustration 3 |
g00790593 |
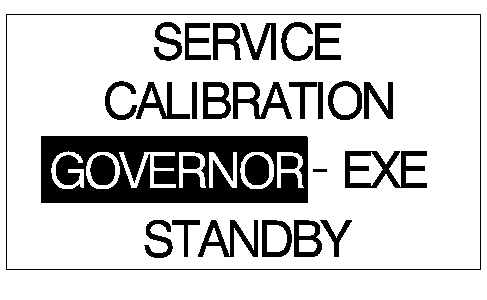
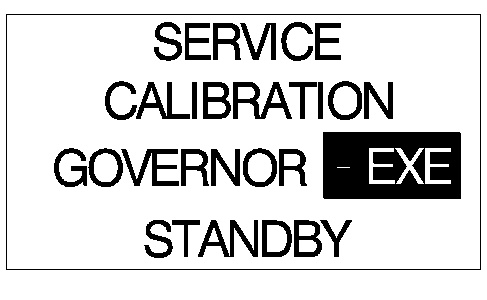
- Highlight the third line by using the keys for direction. The name of the device will be shown on the third line. Scroll downward until “STANDBY” is highlighted. Press the “OK” key in order to start the calibration procedure. “GOVERNOR-EXE” is displayed on the third line when the governor actuator is calibrated. Press the “OK” key after confirming the display of “GOVERNOR-EXE”.
|
|
|
|
| Illustration 4 |
g00790592 |
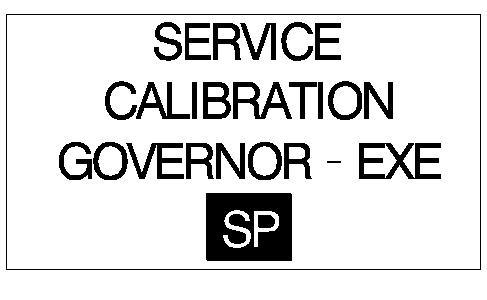
- The above illustration shows a display that is temporarily shown when the governor actuator is moved to the initial position. Press the “OK” key again when the display shows “SP”. The calibration procedure has started.
|
|
|
|
| Illustration 5 |
g00790597 |
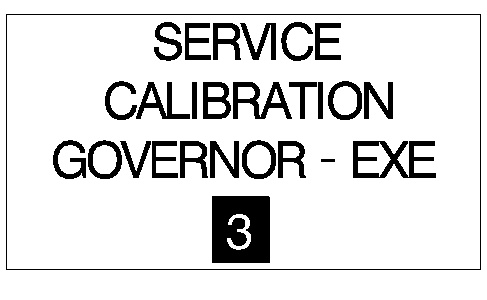
- The numerical number that is being displayed in the fourth line will change during the calibration. This number is related to the process of the calibration. See the following table 1.
Table 1
| Content For The Process |
| Display |
Process |
| STANDBY |
Prior to calibration |
| 1 |
Transfer of the initial position of the governor actuator |
| SP |
The initial transfer of the information about the position has been completed. |
| 3 |
High idle search |
| 4 |
Positioning of the high idle |
| 5 |
Data collection of the intermediate points (9-2) down |
| 6 |
Low idle search |
| 7 |
Data acquisition of intermediate points (2-9) up |
| 8 |
Confirmation of the high idle |
| 9 |
Confirmation of the setting for the speed dial (down) |
| 10 |
Confirmation of the setting for the speed dial (up) |
| 11 |
End processing |
|
|
|
|
| Illustration 6 |
g00790598 |
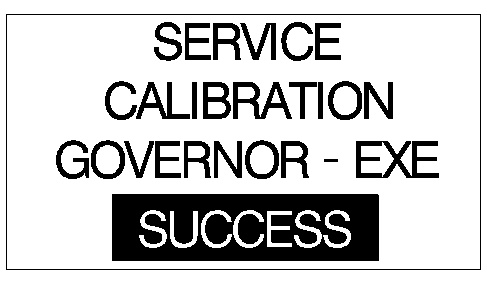
- The above illustration is shown after the governor actuator has completed the calibration.
If the fourth line of the display shows any of the following warnings a failure is present. See the following table 2 for a detailed description of the warning displays.
Table 2
| Warning Codes |
| Display |
Warning |
Corrective Action |
| Wire Pitch X (X is a number from 0 to 9) |
Wire nut is installed too loose by X pitch. X can be a positive or negative number. Turn clockwise. |
Tighten the accelerator cable by the displayed pitch. Perform the calibration again. |
| Wire Pitch X (X is number from -9 to 0) |
Wire nut is installed too tight by X pitch. X can be a positive or negative number. Turn clockwise. |
Loosen the accelerator cable by the displayed pitch. Perform the calibration again. |
| WARNING 01 |
Insufficient high idle |
High idle is less than the specified value due to malfunction of the engine, incorrect installation of the governor cable, poor fuel, etc. After the engine has been inspected for a malfunction, reinstall the cable and perform the calibration again. |
| WARNING 02 |
Incorrect installation of cable |
Reinstall the cable and perform the calibration again. |
| WARNING 03 |
Excessive low idle |
Low idle is more than the value specified due to a malfunction in the engine, an incorrectly installed governor cable, etc. After the engine has been inspected, reinstall the cable and perform the calibration again. |
| WARNING 04 |
Excessive hysteresis |
Ensure that the cable is adjusted correctly. Reinstall the cable and perform the calibration again. |
| WARNING 05 |
Unstable high idle |
High idle is unstable due to a malfunction in the engine, an incorrect installation of the governor cable, etc. After the engine has been inspected, reinstall the cable and perform the calibration again. |
| WARNING 06 |
Unstable dial speed |
The speed for the dial setting is unstable due to a malfunction in the engine, an incorrectly installed cable, etc. After the engine has been inspected, reinstall the cable and perform the calibration again. |
If the fourth line of the display shows any of the following errors a failure is present. See the following table for a detailed description of the error displays.
Table 3
| Error Codes For The Governor Actuator |
| Error Code |
Description Of The Error |
Corrective Action |
| ERROR 01 |
Improper calibration of another device |
Stop the calibration of the other device. Perform one calibration at a time. |
| ERROR 02 |
Improper calibration of another module |
Stop the calibration of the other device. Perform one calibration at a time. |
| ERROR 03 |
Failure of the interlock signal |
Perform the troubleshooting procedure that will confirm the signal that communicates with the monitor. |
| ERROR 11 |
Abnormal speed sensor |
Troubleshoot the confirmation of the speed sensor. |
| ERROR 12 |
Engine stop |
Perform the calibration again. Try to prevent the engine from stopping. |
| ERROR 13 |
Load available |
Reset all operational levers to the neutral position. Perform the calibration again. |
| ERROR 14 |
Overheating of the coolant or the hydraulic oil during the calibration |
You need to allow the complete cooldown. Clear the overheating condition. Perform the calibration procedure again. |
| ERROR 15 |
Pressure decrease in the engine oil
Check for clogged air cleaner |
Clear the abnormal occurrence and perform the calibration again. |
| ERROR 16 |
Excessive governor movement time |
Troubleshoot the confirmation of the governor actuator. |
Perform the following procedure when the data for the calibration of the governor actuator is cleared.
|
|

|
|
| Illustration 7 |
g00790593 |
- Highlight the third line by using the arrow keys.
|
|
|
|
| Illustration 8 |
g00790641 |
- Press the “menu” key. The area that is highlighted will scroll to the right.
|
|
|
|
| Illustration 9 |
g00790642 |
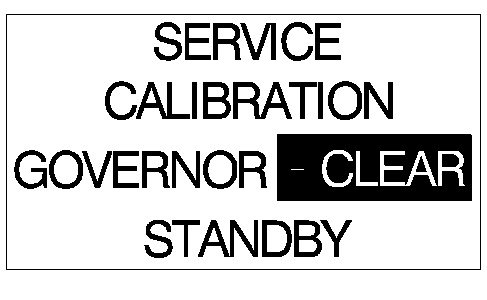
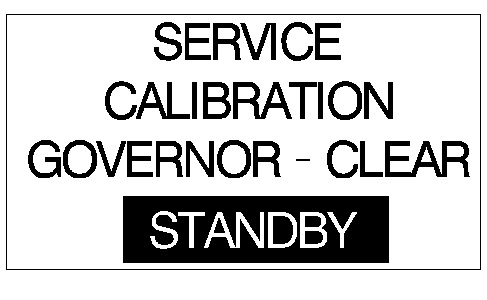
- Change the display of the third line in order to show “CLEAR” by using the arrow keys. See the above illustration.
|
|
|
|
| Illustration 10 |
g00790651 |
- Highlight the fourth line by using the directional keys. Press the “OK” key when the fourth line is highlighted.


