“Synchronize Service Hour Meters” for PL321
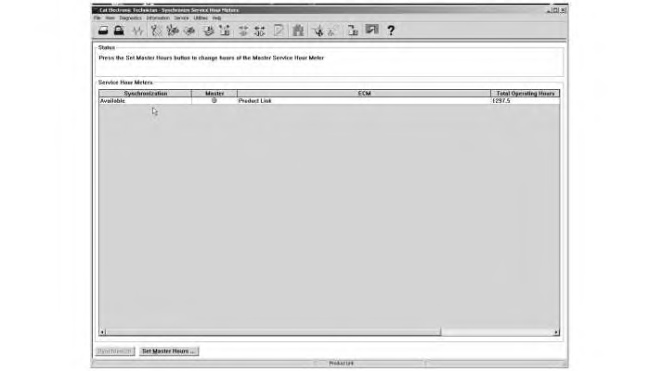
In order to perform the “Synchronize Service Hour Meters” function, select the “Service” menu, and “Synchronize Service Hour Meters” from the drop-down menu.
The machine maintains a function that is called “Sync Clock”. In a PL321 system, the Product Link clock can be the master or the slave. This criteria is automatically determined by the priority that is provided to each ECM when the machine is designed. In most cases, Product Link will not be the master ECM. If Product Link is not the master, the user must use the “Synchronize” button in order to synchronize the Product Link SMH to the master ECM SMH. Product Link could be the master ECM if the following scenarios occur:
- No other ECM on the machine is SYNC clock capable/enabled.
- No other ECM on the machine has a priority higher than Product Link.
If Product Link is the master ECM, the user should select the “Set Master Hours” button. Once the master hours have been set, click the”Synchronize” button in order to synchronize any other sync-clock capable/enabled ECM. Refer to Illustration 1.
Note: In order to change the SMH to a value lower than the current value, a factory password will be required.
Note: In a PL321 system using sync-clock where Product Link is not the master ECM, the Product Link module will automatically sync to the master ECM hours if the difference is not greater than 50 hours. If the difference is greater than 50 hours, a diagnostic will be generated in Cat ET that indicates that a manual sync is required. In that instance, sync the hours (Service/Synchronize Service Meter Hours) unless the master ECM hours are incorrect.
If Product Link is not the master ECM, and the master ECM hours are not correct, troubleshoot on machine side. Do not replace the Product Link module.
|
|
|
|
|
|
| Illustration 1 | g01362745 |
|
“Synchronize Service Hour Meters” Screen |
|
“PLM Commands”
|
|
|
|
|
|
| Illustration 2 | g01362129 |
|
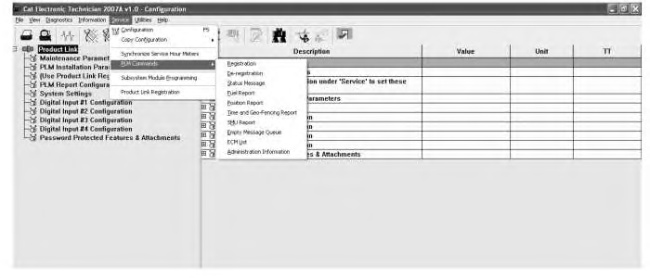
“PLM Commands” Menu for Cat ET |
|
There are ten commands that can be completed by selecting “Service/PLM Commands” from the menu bar in Cat ET.
Registration – This command automatically queues a registration message and an administration message. The registration message will queue up and wait for the next available satellite to complete the process. The parameters “Queued Registration Messages”and “Queued Administration Messages” in “Message Queue” will show a value of “1”. When the registration message and administration messages has been successfully transmitted, the value will change back to “0”. This registration process can take from 15 minutes to 1 hour. The time frame is dependent on the performance of the communications network.
Note: Performing the registration process will activate the installed system. Complete the configuration process prior to performing the registration process.
Note: In order to register Product Link, the Product Link antenna must have a clear view of the sky for detecting satellites. Therefore, if the machine is inside of a building or another structure that would prevent a clear view of the sky, the machine will need to be moved outside. The yellow LED and the orange LED on the PL121SR radio should be solid in order to ensure that a lock has been established with the satellite. If the LED indicators for the radio cannot be observed, then the user can look in Cat ET at “Satellite Information” and “Satellite Communication Status” in order to determine that satellite communication has been established.
De-registration – This command de-registers the Product Link before removing the unit for installation on another machine. This command will set all of the fields back to the default values. This command will clear the memory of the unit. All of the Fence settings and diagnostics in the memory are erased. After the message is “queued”, the message should enter the Message Queue. This message can be viewed by observing “Message Queue” for the Product Link ECM. After the message has been transmitted, the unit can be removed. The unit can be reinstalled on another machine.
Status Message – This command queues the following status descriptions: SMH, location and fuel.
Fuel Report – This command queues a fuel report.
Position Report – This command queues a position report.
Time and Geo-Fencing Report – This command queues a “Time and Geo-Fencing Report” report.
SMH Report – This command queues a “SMH” report.
Empty Message Queue – This command clears all messages out of the message queue. This command can be used in order to clear messages that are inadvertently added to the queue.
ECM List – This command queues up an “ECM List Report” after a wait of a few minutes. The “ECM List Report” includes a list of all ECM modules (and the associated serial numbers, software part numbers, and sync-clock status) detected by the Product Link that are connected to the Cat Datalink. The “ECM List” is automatically sent at the time of registration. The “ECM List” contains a unique identifier for each ECM that is detected by the Cat Datalink
Administration Message – This command queues an Administration message. This message contains data from the “Configuration”screen. The following examples are data examples: “PLM Report Configuration Parameters”, “System Settings” and “Digital Input Configurations”.
Note: Once these entries have been entered, the Product Link Module will automatically queue an Administration message after 15 minutes. The Product Link can be forced to queue a message sooner by using this command.
In order to register a module for the first time, follow the procedure that is listed below.
- Click “Service” on the toolbar. Select “Product Link Registration”. Refer to Illustration 3.
|
|
|
|
|
|
| Illustration 3 | g01362222 |
|
“Registration” Screen |
|
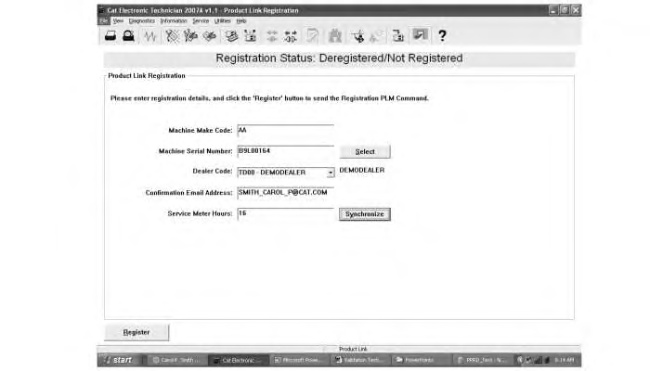
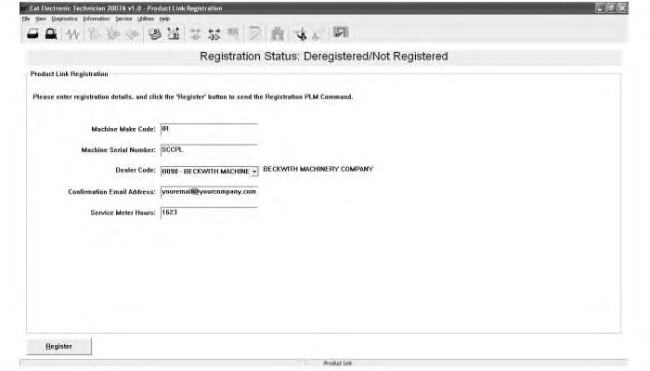
- Enter information in the following fields: “Machine Make Code”, “Machine Serial Number”, “Dealer Code”, “Confirmation Email Address” (optional) and “Service Meter Hours”. Refer to Illustration 5.
Note: In a PL321 system, the machine serial number will be auto filled via information from the other ECMs on the CDL. The user will have the option to “Synchronize Service Meter Hours” if the PL321 is considered a “slave”. The user will have the option to “Set Master Hours” if the PL321 is considered the “master”. Refer to Illustration 4.
Note: This will not change the SMH on other ECMs. Only the SMH on Product Link will be modified.
- Click “Register”. Refer to Illustration 5.
- After “Registration” is selected, a dialog box will appear. The message will ask “Are you sure?”. Click “Yes” or click “No”. Clicking “Yes” will queue the registration messages and administration messages.
- A confirmation message will be displayed. Click “OK”
Note: After receiving a confirmation, you will be returned to the “Registration” screen.
|
|
|
|
|
|
| Illustration 4 | g01369431 |
|
PL321 “Registration Configuration” Screen |
|
|
|
|
|
|
|
| Illustration 5 | g01362209 |
|
PL121 “Registration Configuration” Screen |
|
In order to register the system again, follow the procedure that is listed below.
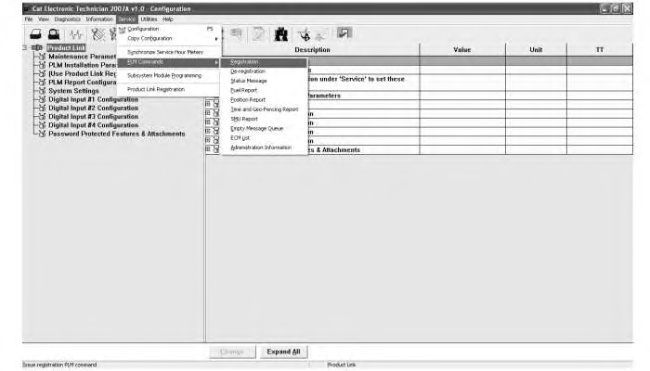
- Click “Service” on the tool bar. Select “PLM Commands”. Click “Registration” on the pull-down menu in order to start the registration process. Refer to Illustration 3.
- After “Registration” is selected, a dialog box will appear. The message will ask “Are you sure?”. Click “Yes” or click “No”.
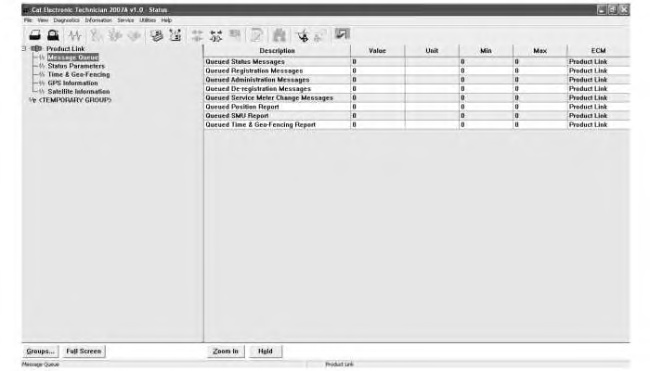
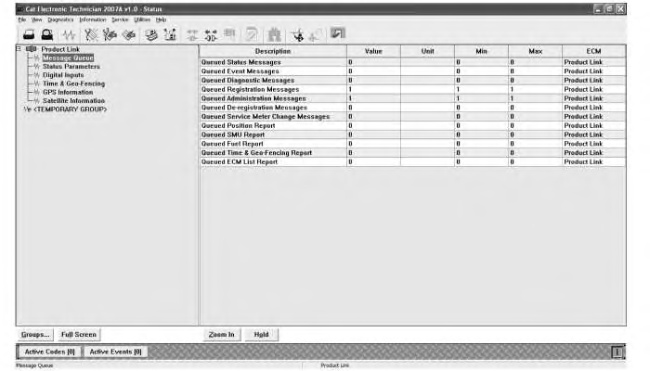
- The registration message and administration message will “queue up”.The parameters “Queued Registration Messages” and “Queued Administration Messages” in “Message Queue” will show a value of “1”. When the registration message has been successfully transmitted, the value will change back to “0”. This registration process can take from 15 minutes to 1 hour. This time frame depends on performance of the communications network.
Note: The “Status Parameters” PLM Registration Status will change immediately to “Confirmation Pending”. The “PLM Registration Status” will change to “Registered” once the module receives the confirmation that “the message was received and processed successfully in the backoffice (EM)”. If the message was not processed successfully in the BackOffice, the “PLM Registration Status” will change to “Failed”. If this occurs, the parameters should be verified for accuracy. If changes are required, repeat the original registration process via “Service”, “Product Link Registration”. Illustrations 6 and 7 are examples of the queued status screens for registration messages.
|
|
|
|
|
|
| Illustration 6 | g01362236 |
|
“Queue Status” Screen ( PL121SR) |
|
Note: The “Queued Registration Messages” and the “Queued Administration Messages” value will be “1 ” while the messages are still in the queue.
|
|
|
|
|
|
| Illustration 7 | g01362237 |
|
“Queue Status” Screen ( PL321SR) |
|
